Learning how to roll a joint that burns just right doesn’t start with the paper; it starts with getting your gear in order. Having the right tools on hand transforms a potentially messy, frustrating task into a smooth, enjoyable ritual. Think of it as your pre-flight check; this simple prep work is the difference between a perfect smoke and a disappointing one.
Gathering Your Essential Rolling Supplies

Before you even think about the tuck-and-roll, let’s build your foundation. Just like cooking a great meal, your ingredients and tools are everything. Rushing this prep step is a classic rookie mistake that almost always leads to a joint that canoes or refuses to stay lit.
It all starts with the main event: your cannabis. Quality flower is non-negotiable for a good experience. If you need some guidance, visiting a local shop is the best way to explore different strains and find something you’ll truly enjoy. A quick search for a cannabis dispensary near you is the perfect place to start.
Your Rolling Toolkit and Why Each Item Matters
To achieve that perfect roll, you need more than just good flower. Each tool in your kit plays a specific, vital role in creating a smokeable masterpiece. Here’s an actionable rundown of the essentials and why they matter.
| Tool | Why It’s Important | Actionable Insight |
|---|---|---|
| Cannabis Flower | The core ingredient. Quality directly dictates your experience. | Start with 0.3 to 0.5 grams for a standard joint. |
| Grinder | Creates a consistent, fluffy texture for an even, slow burn. | A four-piece metal grinder is ideal. Aim for a 1 mm particle size for optimal airflow. |
| Rolling Papers | The vessel for your joint. The material impacts taste and burn speed. | Hemp papers are sturdy and have more grip, making them a great choice for beginners. |
| Crutch (Filter) | Adds structure, prevents inhaling flower, and protects your fingers. | Make your own from a business card or the paper pack flap for a sturdier, more reliable filter. |
| Rolling Tray | Keeps your workspace tidy and prevents waste. | Choose a tray with a curved edge. This makes it effortless to scoop up stray material. |
Having these items ready to go makes the entire process cleaner, faster, and far more rewarding.
A Closer Look at Your Gear
A quality grinder is your most valuable asset here. It’s not just about breaking up the flower; it’s about achieving that perfect fluffy consistency that allows for optimal airflow. Without it, you’re left with a lumpy, uneven roll that’s guaranteed to burn poorly.
Once your flower is ready, you’ll need a few more key items to bring it all together.
- Rolling Papers: They come in all shapes and sizes, from classic hemp to nearly-transparent rice paper. If you’re just starting, grab some hemp papers; their texture provides a little more grip, making them easier to handle.
- A Crutch (or Filter): This small piece of rolled-up cardstock is a game-changer. It gives the joint a solid base to hold onto, stops tiny bits of flower from getting in your mouth, and lets you smoke it all the way down without burning your fingertips.
- A Rolling Tray: While not strictly necessary, it’s a worthy investment. A good tray keeps your space clean and ensures you don’t lose any of that precious ground flower during the process.
Setting yourself up with the right gear isn’t just about making things easier. It’s the first real step toward mastering the art of a perfect, slow-burning joint.
Look, the secret to a joint that burns perfectly, slow and even, happens long before you lick the paper. If you rush the prep, you’re just setting yourself up for a canoe-fest and a lot of frustration.
It all boils down to two things: the grind and the filter. Nail these, and you’ve won half the battle.
Getting the Grind Just Right
First things first, let’s talk about grinding your flower. You’re aiming for a consistency that’s fluffy and even, almost like coarse breadcrumbs. You definitely don’t want big, awkward chunks or a pile of fine powder.
Why does this matter so much? Airflow. That perfect grind lets air move through the joint smoothly, which is what prevents one side from burning way faster than the other (the dreaded “canoe”). If it’s too chunky, you’ll get air pockets that make it burn hot and fast. If you pulverize it into dust, you’ll pack it too tight and won’t be able to get a decent draw. A simple metal grinder is your best tool for hitting that sweet spot every time. To better understand your starting material, our guide on understanding cannabis flower is a great resource.
This is what a classic four-piece grinder looks like when you take it apart.
You can see the grinding teeth up top, the screen that sifts out the finer particles, and the collection chamber below. It’s all designed to give you that consistent, roll-ready texture.
How to Make a Solid Filter
Next up is the filter, also known as a crutch or a tip. Do not skip this step. This piece of cardstock is a game-changer because it gives the joint structure, makes it easier to hold, and prevents you from getting a mouthful of “Scooby Snacks” (tiny bits of flower).
Making one is incredibly simple:
- Grab a small, rectangular piece of stiff paper. The tear-off flap from your rolling paper pack or a corner of a business card is perfect.
- Make a few small accordion folds at one end, think of a “W” or “M” shape. This creates a barrier that stops any plant matter from getting through.
- Now, roll the rest of the paper tightly around those folds until you have a firm little cylinder.
Your filter is the backbone of the entire operation. It doesn’t just make for a better smoke; it gives you a solid foundation to roll a tight, clean joint around. Taking an extra 30 seconds to make a good one is always worth it.
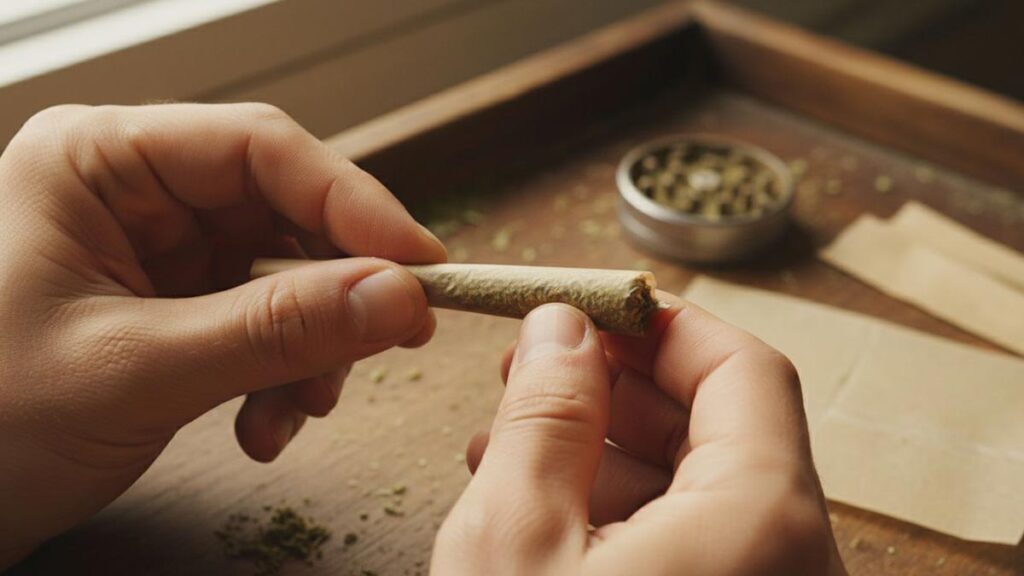
Mastering the Tuck and Roll Technique
Alright, you’ve got everything prepped. This is the moment of truth in learning how to roll a joint, where practice truly makes perfect. It’s less about rigid steps and more about developing a feel for the process. This is the delicate dance that turns a pinch of flower into a great smoke.
First, get that ground cannabis into the paper. Carefully scoop it into the crease and spread it out evenly from the filter to the other end, aiming for a consistent, log-like shape. If you’re just starting out, stick with a straight cylinder; it’s much more forgiving than attempting a perfect cone right away. For those new to cannabis, some strains are easier to handle. Our guide on the best cannabis strains for beginners can help you choose.
This visual breaks down the prep work into its three key parts. Getting this right sets you up for a much smoother roll.
The Art of the Tuck
This is where most people stumble. The tuck is that critical first fold where you get the edge of the paper closest to you to wrap snugly behind the cannabis.
Gently cradle the joint-to-be between your thumbs and index fingers. Use your thumbs to roll the flower back and forth. This isn’t just fidgeting, it’s how you compact the cannabis into that tight, uniform shape. Once it feels compact, use the tips of your thumbs to push the front edge of the paper down and in, sliding it behind the flower.
Pro Tip: Don’t force it. The tuck is a gentle, confident move. You want consistent pressure to create a tight cylinder, starting right at the filter and working your way across.
Completing the Roll
Once you’ve nailed the tuck, you’re on the home stretch. Keep rolling the joint upwards with your thumbs, using your index fingers to keep everything straight and maintain its shape. Go slow and steady until you reach the gum strip.
A good roll isn’t just for looks; it ensures a better experience. The amount of THC in a joint can vary widely depending on potency and how much you pack in. According to a study cited by the National Institute on Drug Abuse (NIDA), the potency of cannabis has increased significantly over the past few decades. A well-rolled joint burns evenly, resulting in a consistent, smooth draw and a more predictable effect.
Nailing the Finish: Sealing and Packing Your Joint
You’ve made it past the tricky part, the tuck and roll. Now it’s time for the finishing touches that elevate a decent joint into a great one. Getting the seal, pack, and twist right is what ensures that smooth, even burn we’re all after.
First up, the seal. Gently lick the gummy strip from one end to the other. The key here is lightly. A classic rookie mistake is to drench the paper, which can easily lead to rips or a seal that fails halfway through your smoke. You just need enough moisture to create a solid bond.
With the joint sealed, the next step is to perfect the density. This is an absolutely essential part of learning how to roll properly.
The Pack and Twist: Your Final Flourish
Find something long and thin to help you out, a pen, the plastic tip of a shoelace (an aglet!), or even a chopstick will do the trick. Hold your joint upright and gently poke down the cannabis from the open end. You’re not trying to cram it in like a sausage; you just want to nudge it down to remove any gaps.
This gentle packing is critical for two reasons:
- It Eliminates Air Pockets: These gaps are the primary cause of a joint “canoeing,” where one side burns much faster than the other. Packing gets rid of them.
- It Creates a Consistent Burn: A well-packed joint delivers a smoother draw and burns slower and more evenly, improving the overall experience.
After a few light taps, the flower inside should feel firm but still have a bit of give. Pack it too tightly, and you’ll struggle to get any airflow. Leave it too loose, and it’ll burn down in a flash.
Once you’re happy with the pack, put any leftover flower away to keep it fresh. If you need some ideas, we have a great guide on the best cannabis storage containers.
Now for the final move: the twist. Simply pinch the extra paper at the tip and give it a little twist to create a wick. Not only does it look clean and professional, but it also helps you light the joint perfectly for that first puff.
Troubleshooting Common Rolling Problems
Even seasoned pros roll a dud now and then, so don’t sweat it. Every rolling problem has a solution, and learning how to roll is really about learning how to correct these minor mistakes as you go.
The most infamous issue is the dreaded “canoe.” This almost always comes down to an uneven pack creating air pockets that burn too quickly. The best fix is to do it before you light it. As you’re rolling, ensure your cannabis is spread evenly, and once you seal it, give it a gentle but firm pack to settle everything into place.
Solving this is a big reason the market for pre-rolls is booming, with sales jumping 11.89% in just the last year. But learning to roll your own saves money and gives you complete control. You can dive deeper into this trend and consumer spending habits over at Marijuana Moment.
How to Spot and Fix Your Roll
A few other frustrations can pop up, but once you know what to look for, you can adjust your technique on the fly for a better smoke every time.
- It’s Too Tight to Draw: You’ve packed it too densely. Next time, ease up on your grip and be more gentle when you pack it down. Example: If you have to strain to get any smoke, gently roll the joint between your fingers to loosen the contents slightly.
- It Burns Way Too Fast: It’s too loose. All that extra air is fueling the fire. Focus on getting a snugger tuck and a tighter roll to compact everything more evenly.
- The Filter Slips Out: A wobbly filter can ruin a great joint. Make sure you roll your crutch nice and tight, and start your tuck right up against it to lock it in place.
- The Paper Rips When Tucking: This is usually caused by too much force or moisture. Be delicate with the tucking motion and use only a tiny bit of moisture to seal the gum line.
A great joint is all about finding that perfect balance, not too tight, not too loose. With a little practice, you’ll develop a feel for the right density, and your troubleshooting days will be behind you.
Got Questions About Rolling? We’ve Got Answers.
Even with a step-by-step guide, you’re bound to run into a few snags when you’re first learning to roll. That’s completely normal. Let’s tackle some of the most common questions that come up so you can get your technique dialed in.
Think of this as your troubleshooting FAQ, the small details that make a big difference between a frustrating roll and a perfect one.
Common Beginner Questions
Which rolling papers are best for beginners?
When you’re just starting out, I always recommend standard 1 1/4 inch hemp papers. They have a bit more texture and thickness compared to something like rice paper, which makes them way easier to grip and manage as you’re trying to get the tuck just right. Once you’ve got the hang of it, you can experiment. For example, thinner rice papers burn slower and you taste more of your flower, but they can be slippery if you’re not used to them.
What can I use to make a crutch or filter?
You don’t need to buy anything special. Almost any piece of stiff, thin cardboard will do. The tear-off flap from your pack of rolling papers is the classic choice, but a business card or a thin index card works perfectly in a pinch. Just cut it down to the right size.
A solid crutch is the backbone of a good joint. My go-to method is to cut a small rectangle, make a few little accordion folds at one end to form a ‘W’, and then roll the rest of the strip around it. This provides great structure and keeps the airflow open.
How can I stop my joints from canoeing?
Ah, the dreaded canoe. This almost always comes down to two things: an uneven pack or a bad light.
- The Pack: Ensure your flower is ground evenly (no big chunks!) and spread in a consistent line before you start rolling. Lumps and gaps are the enemy.
- The Light: When you light it, don’t just torch the tip and start puffing. Gently rotate the joint in the flame until the entire end is glowing red. Then take your first draw. This creates an even cherry and is the best defense against canoeing.
Ready to find the perfect flower for your next roll? VT Strong Cannabis Dispensary offers Vermont’s finest craft cannabis with a unique deli-style experience. Our knowledgeable staff can help you find exactly what you need. Visit us in-store or check out our selection online.